
Each instance in your dashboard represents a standalone AI agent (chat, voice or mail) designed for a specific task such as customer support chatbot on your website, voicebot on your incoming line, outbound voicebot actively calling your customers etc.
Instance includes everything your agent needs to operate:
-
Dialog flows for setting up your automation logic
-
Knowledge base for LLM generated responses
-
Discussions history to see user conversations with your AI agent
-
Instance settings and configurations
Instance types
You can create different types of instances: Chat, Voice, and Email. Each type shares the same core logic but is optimized for a specifics of selected communication channel:
-
Chat: Supports visual elements like carousels, forms, quick replies, buttons and many more.
-
Voice: Lets you define how responses should sound using text-to-speech synthesis, and also allows you to create outbound campaigns that actively contact your customers.
-
Email: Provides a simple editor to craft email-based responses.
Dialog flows are fully compatible across instance types. You can copy and paste logic between projects with Ctrl+C / Ctrl+V, or even transfer a full chat flow to another instance when needed.
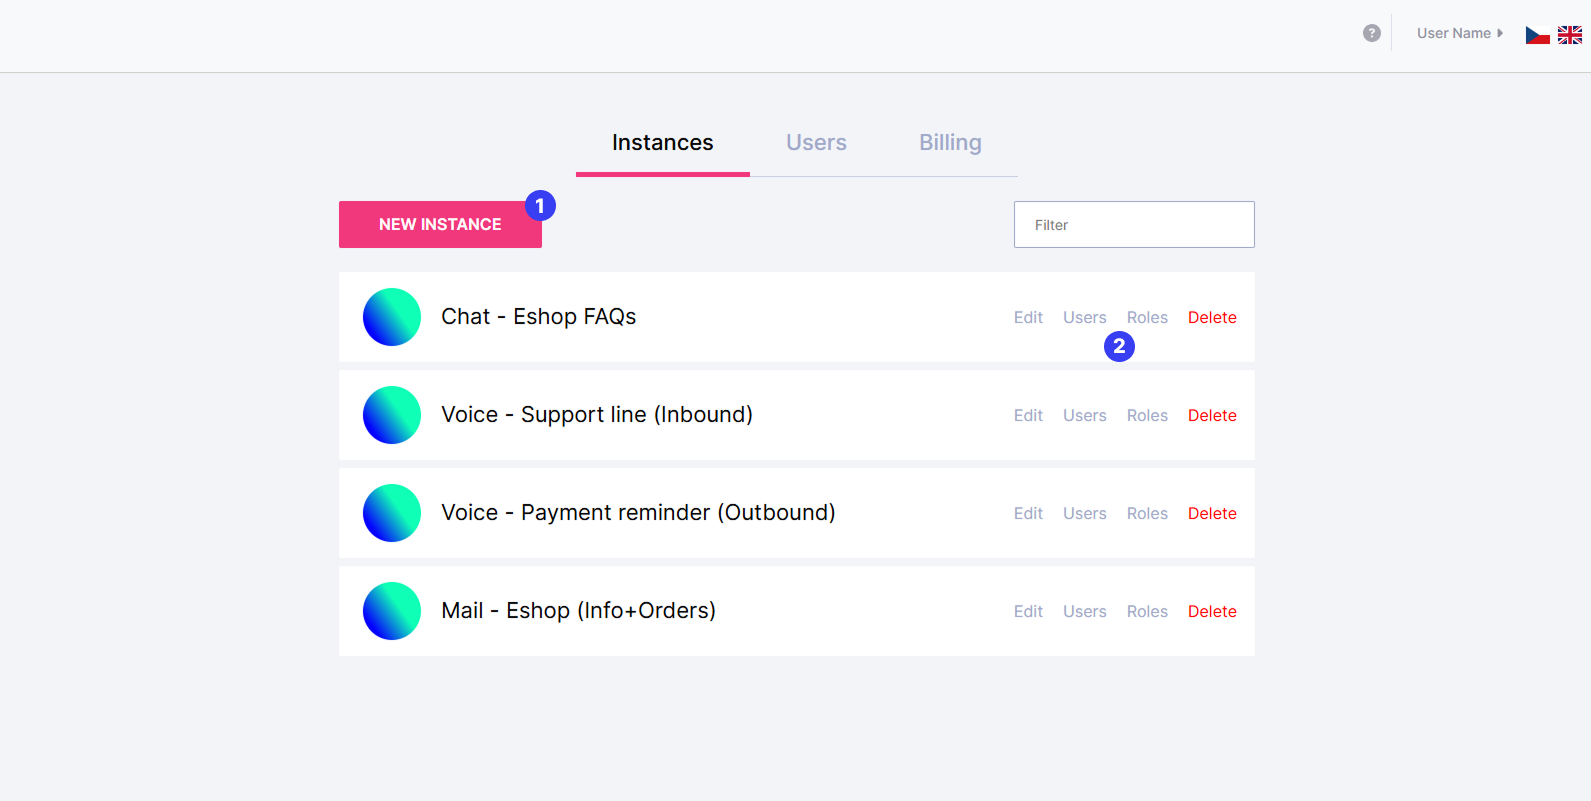
What you can do on this page
-
Create a new instance
Start building a new AI project from scratch, premade template or duplicating already existing instance. -
Manage existing instances
For each listed instance, you can:-
Edit: Update the project’s configuration and name
-
Manage Users: Add or remove users with access
-
Set Roles: Define permissions for each user roles (eg. Admin, Operator…)
-
Delete: Permanently remove the instance (irreversible)
-
Only the instances and actions you have permission to access will appear in your dashboard.
Read next