
First, we need to create a test instance. Instances are standalone bots with their own settings, memory, dialog flows and discussions. Most of the logic is the same, with a few differences for each channel (e.g., buttons and carousels for chat, speech synthesis preview for voice, etc.).
You can read more about instances in Instances article.
🆕 Create a New Instance
After logging in, you’ll be redirected to the Deployment Admin where you can manage all your existing bots. You might already see some test or demo instances.
Let’s create a new one from scratch.
-
Click the
New Instancebutton on the Instances tab in your deployment management -
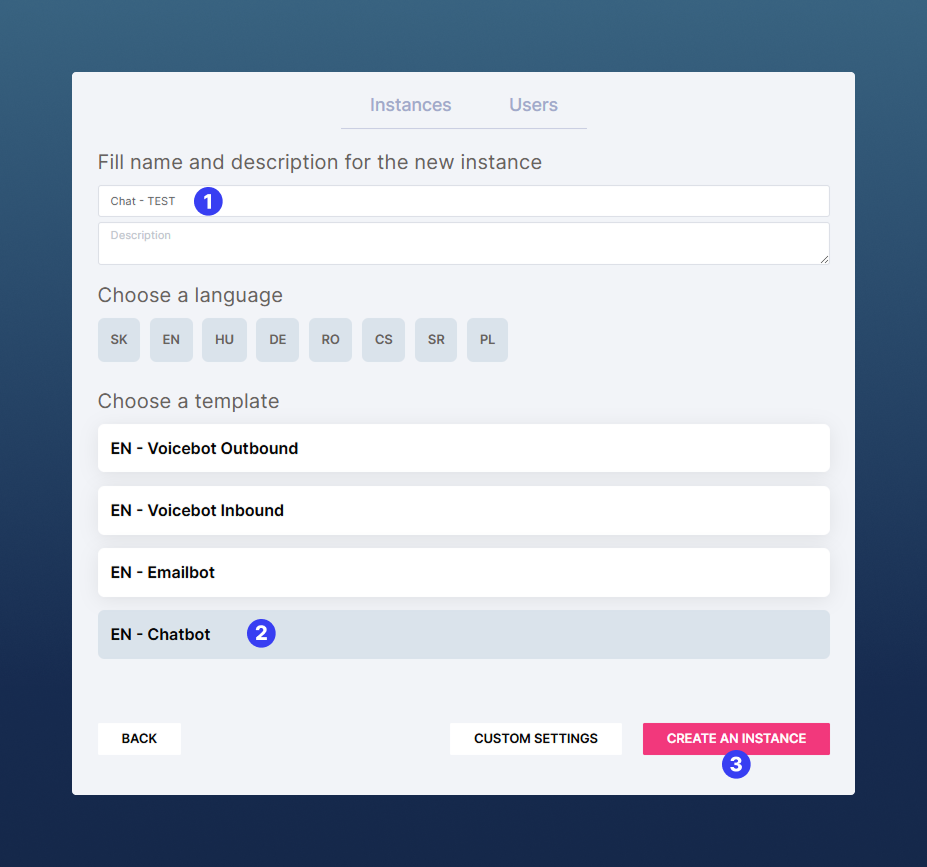
Fill out the instance details.
-
Name your test instance (1)
-
Select language
-
Choose our pre-made
EN - Chatbottemplate (2) -
Confirm with the
Create an instancebutton (3)
-
If your language isn’t listed yet, continue with English. You can still translate your bot’s responses later.
-
Once created, your instance will appear in the list. Click to open.
You’ll be redirected to the Instance Dashboard → this is where statistics will appear once your bot starts handling conversations. But for now, let’s focus on the key tools we'll be using:
🛠 What you’ll work with in this tutorial:
-
Dialogs
This is where you'll build the actual conversation flow logic. The brain of your bot. -
AI Knowledge
Add documents or websites your bot can reference when responding to user questions generatively. -
API Integrations
Connect your bot to external services, CRMs, or custom data via API. -
Chats
View real conversations users have had with your bot. Also useful for testing, debugging and improvement.
That’s it! Your environment is ready. In the next step, we’ll design your first dialog flow and make your bot say its first words!