The API Integrations page lets you configure new integrations or modify existing ones. Integrations connect your AI agent to external services and data sources by calling defined endpoints during conversations.
The API Integrations page is only used to manage, test and log your integrations. To use it in a dialog you need to use an Integration module and connect it to your dialog flow. See 2️⃣ Use Integrations
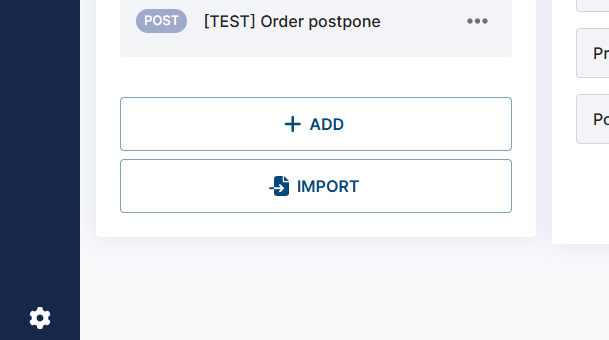
1. Add manually
To add a new integration, manually click the ➕ Add button in the bottom left corner:
A form with four tabs will be displayed:
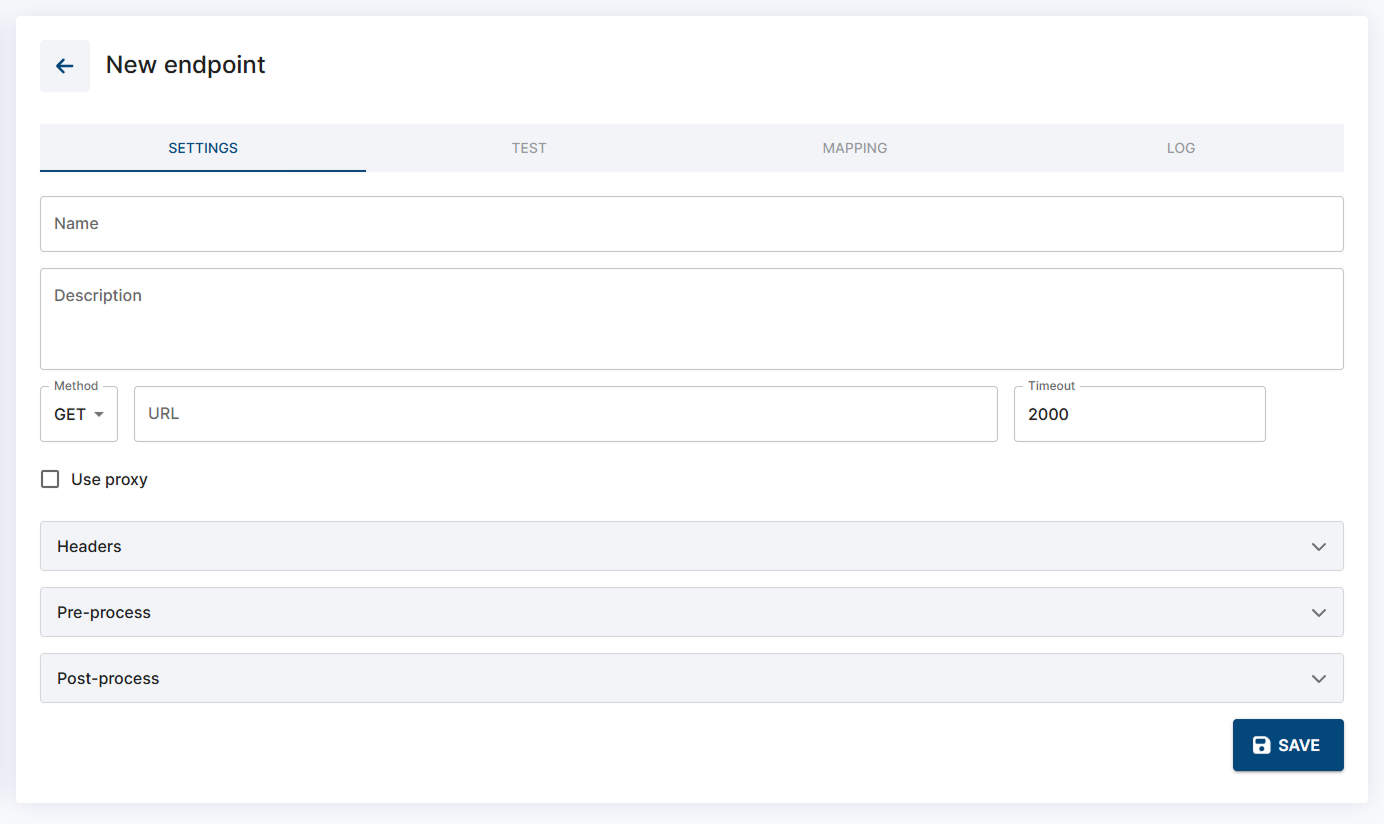
Settings Tab
The Settings tab is where you configure the core behavior of your API integration - including the request method, endpoint URL, headers, and optional JavaScript hooks for pre-processing and post-processing.
Fields and Options
-
Name & Description
Used for identifying the integration in your list. Has no effect on behavior. -
Method
Choose the HTTP method:GET,POST,PUT,PATCH, orDELETE. -
URL
The endpoint URL your agent will call.
You can use $context variables (bot memory) directly in the URL. For example, if a customer provides an order number, you can reference it like this: https://api.yourdomain.com/orders/$user_order
(Assuming $user_order was collected earlier in the AI Agent dialog flow)
-
Timeout
How long (in milliseconds) the agent should wait for a response before failing the call and continuing the dialog flow without result. We always recommend to configure this fallback in a dialog flow in case of failure - you can redirect the dialog to an operator, etc.
Voicebots require fast responses. Avoid slow APIs or use asynchronous calls instead (see the Using Integrations page for more details). In a Chatbot, a delay of a second or two doesn’t matter.
-
Headers
Add any custom headers required by the API (e.g.,Authorization,Content-Type). You can use $context variables, same as in the URL field.
-
Pre-process (JavaScript)
This optional section allows you to manipulate context values before the request is sent.
You have full access to the current context using the context object (context.$my_variable), and you can return an object to add or update values.
Use case examples:
-
Merge or clean user input before using it in a request
-
Format dates or IDs
-
Dynamically build request payloads or headers, etc.
return {
  $full_name: context.$first_name + ' ' + context.$last_name
};
-
Post-process (JavaScript)
Executed after the API response is received and mapped to $context variables (in the Mapping Tab). You can access both using the context object (context.$mapped_variable).
Use this to:
-
Create derived variables
-
Convert values into formats your bot needs
-
Perform lightweight business logic
return {
  $readable_date: new Date(context.$response_timestamp).toLocaleDateString()
};
Both the Pre-process and the Post-process blocks use JavaScript and run the same environment as Lambda modules in Dialogs. See the Lambda Module documentation for further info.
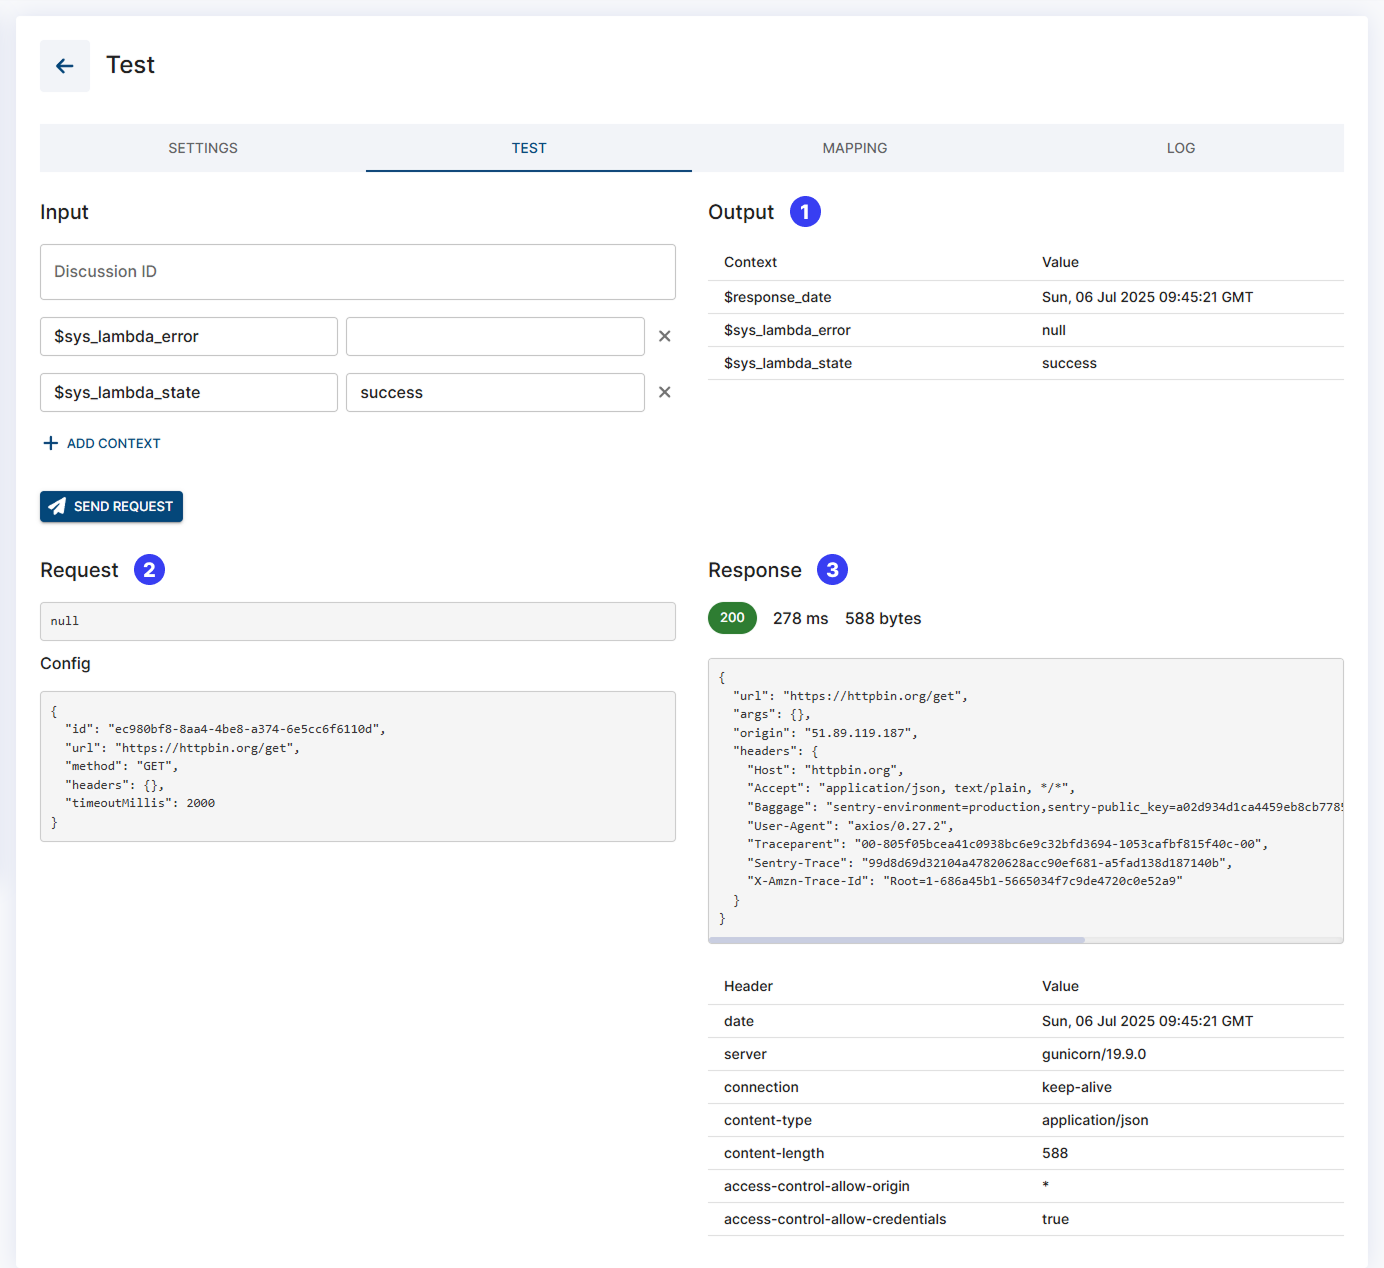
Test Tab
The Test tab lets you simulate a real request to your configured endpoint, so you can verify that everything is working correctly before deploying or using it in a live dialog flow.
This is especially useful for:
-
Debugging request formatting
-
Validating response data structure
-
Checking whether your pre-processing, headers, or mapped context values are behaving as expected
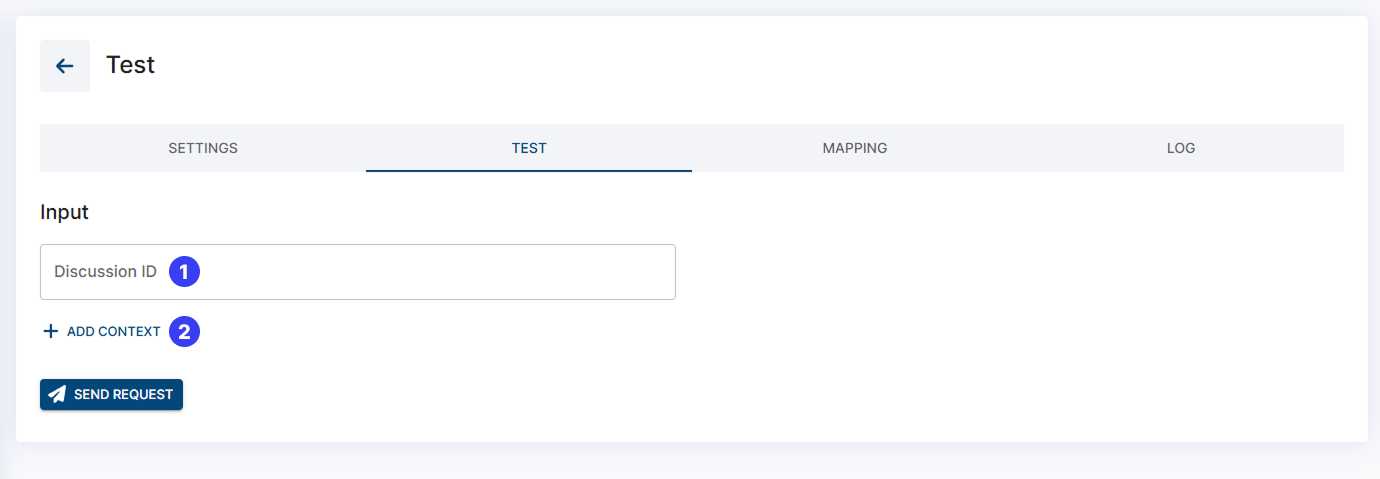
Supplying Test Data
Most API requests rely on $context values like an order number, email address, or customer ID. To send a valid test request, you need to provide those values first.
You can do this in two ways:
-
Manual Input (2)
Add $context variables one by one, along with sample values.
-
Load from an Existing Discussion (1)
Provide the Discussion ID of an existing chat, call, or email thread (found in the Chat / Calls / Emails administration screens or at the end of the URL of a chosen discussion).
-
The system will automatically load all context values from that discussion.
-
Great for debugging and replicating live agent behavior.
Once your context is loaded, hit the Send Request button to send the request. You’ll be able to see:
-
(1) Your mapped context values (if configured in the Mapping tab)
-
(2) The request payload
-
(3) The raw API response
Mapping Tab
The Mapping tab lets you choose which values of the API response should be saved into $context variables, so your agent can use them in replies or conditions.
Usually, you don’t need the full API response. You just want specific data like order status, delivery time, or customer name to make your bot smarter and more dynamic.
Before you can map anything, you need to send a test request in the Test tab. Once a response is received, it will appear in the Mapping tab and you can select which fields to map.
Mapped values:
-
Are saved into
$contexts (your AI Agent’s memory) -
Can be used in bot replies
-
Can be used in conditions (e.g., allow canceling an order only if its status is “Processing”)
-
Can be further modified using post-process logic or a lambda module
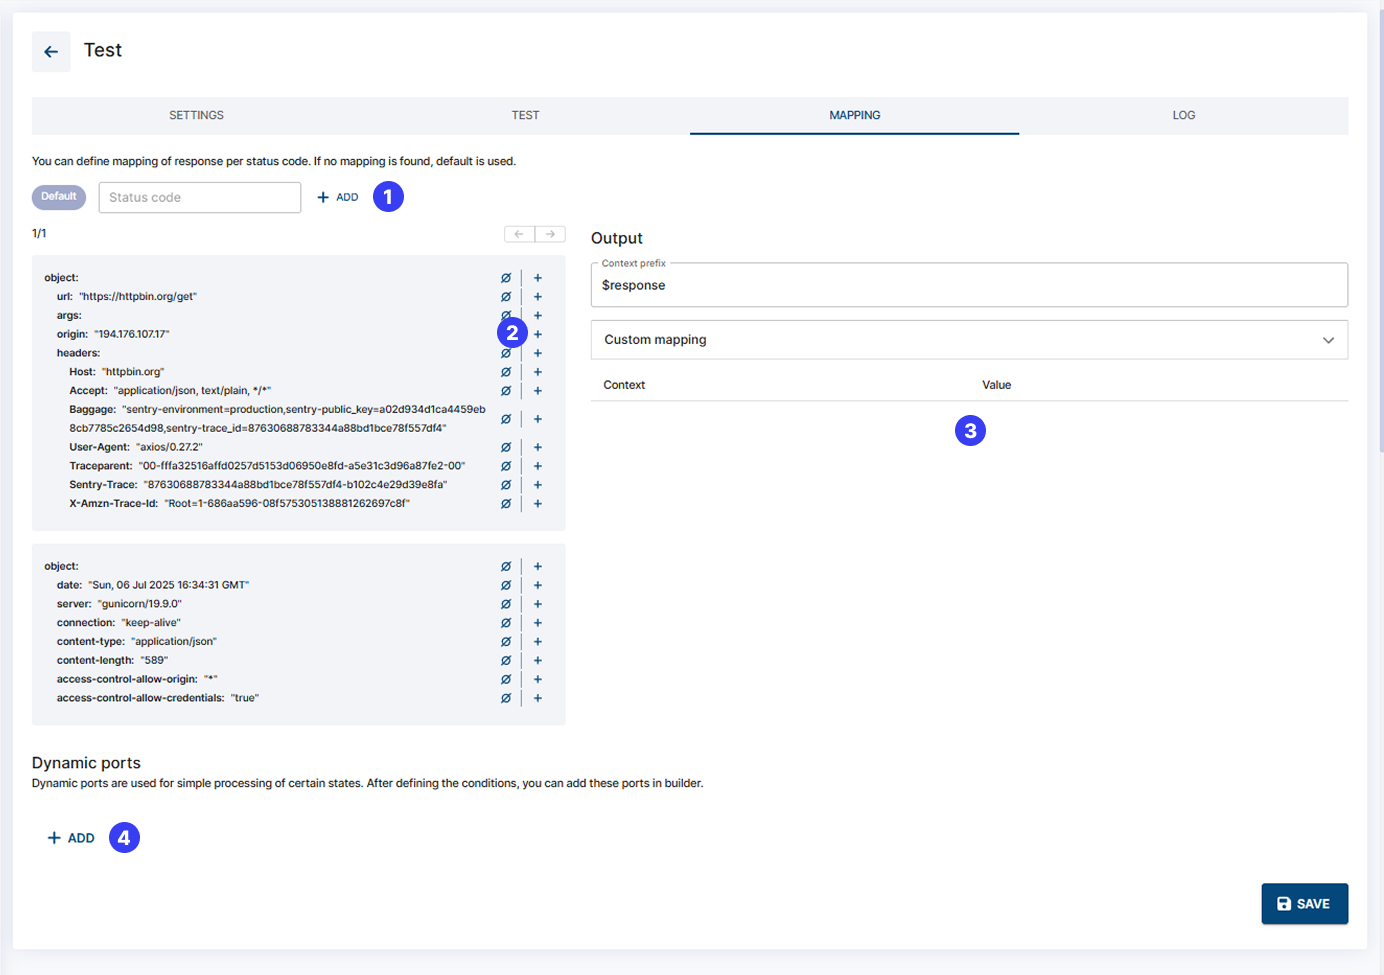
How to Set Up Mapping
Mapping by status code (1)
You can define different mappings depending on the HTTP response status (e.g., 200, 404).
If you don’t need that level of control, simply use the Default mapping for all responses or leave as is.
Response preview (2)
This is the structure of the API response returned during your last test.
Click the ➕ icon next to any value to map it into a $context variable.
Instead of mapping, you can also check whether a value is empty using the Ø button, which will create a boolean $context flag (true or false).
Output + Prefix (3)
The list on the right shows your current mapping rules.
You can set a prefix (e.g., $response, $order, $apiResult), which is prepended to each context name.
Use a clear and unique prefix to keep context values organized when using multiple APIs.
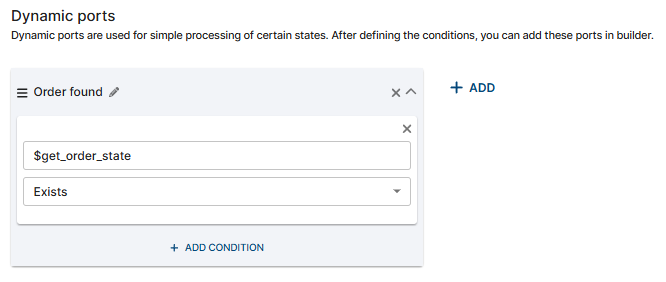
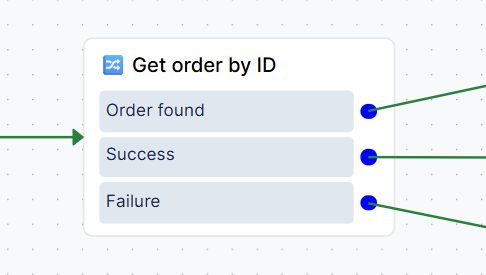
Dynamic ports (4)
Each Integration Module (the “box” used when you connect your integration to your dialog flow) includes two default outputs:
-
Success: request completed successfully within set timeout period
-
Failure: request failed or timed out
You can also create custom outputs (ports) like, e.g.:
-
Order not found→ if$get_order_stateDoes not exist -
Order delivered→ if$get_order_stateIs equal"delivered"
The conditions in Dynamic ports are evaluated from top to bottom. So in the example below, the second condition Order delivered would never trigger, because if the context $get_order_state is equal "delivered", it also means it exists and the first port will be triggered.
-
Order found→$get_order_statecontext Exists (any value is mapped into it) -
Order delivered→$get_order_stateIs equal"delivered"
Log Tab
The Log tab provides a complete history of all requests made through this endpoint, whether they were test requests or requests triggered during live dialogs.
2. Import cURL
You can also import a request in the cURL format. You’ll still need to manually set the mapping and, if needed, the pre-/post-processing.