Understanding the User
In the previous step, we used buttons as a simple and effective way to guide users. Buttons are great, especially in chatbots where users like to click through provided options.
But now it's time to let the AI understand what the user actually says with natural input like questions or commands.
Intent and Entity Detection
To understand free-form user messages, we use Intents and Entities.
-
Intents help the bot understand what the user wants.
-
Entities help extract specific details from what they said.
Example
User says:
"How's the weather in Prague?"
-
Intent:
Get weather -
Entity:
City = Prague
This gives us both the purpose and the key detail needed to respond.
Intents and Entities are not necessary when the bot uses generative responses based on the documents we provided, instead of static responses. This will be covered later on this page.
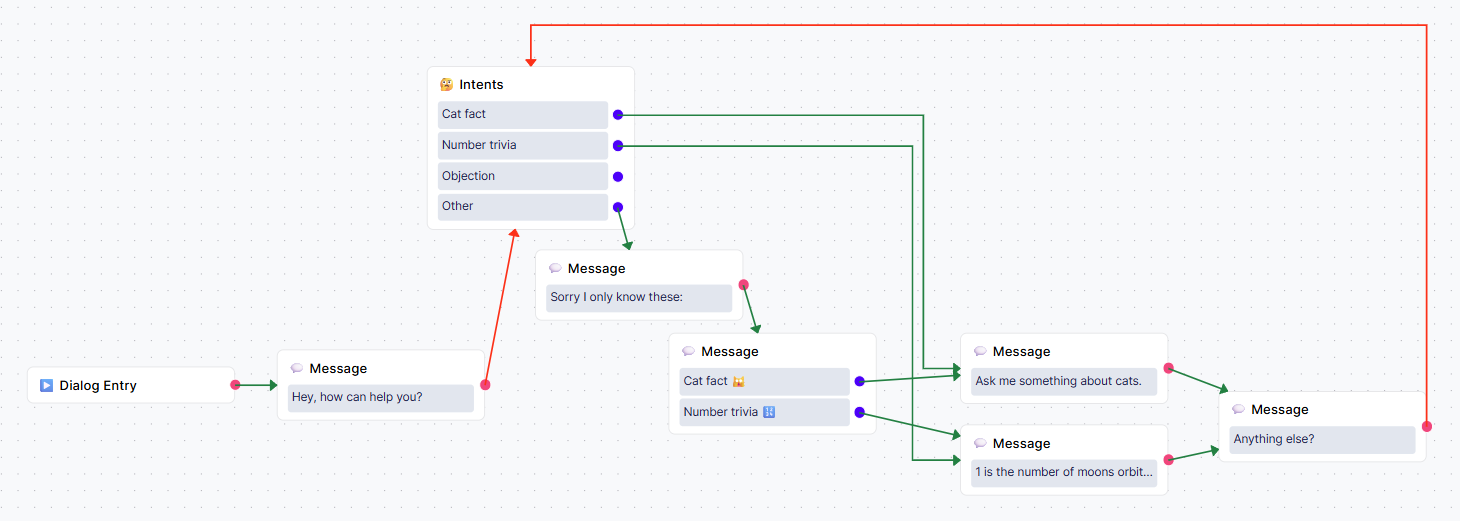
🗨️ 1. Upgrade Your Dialog with Intent Detection
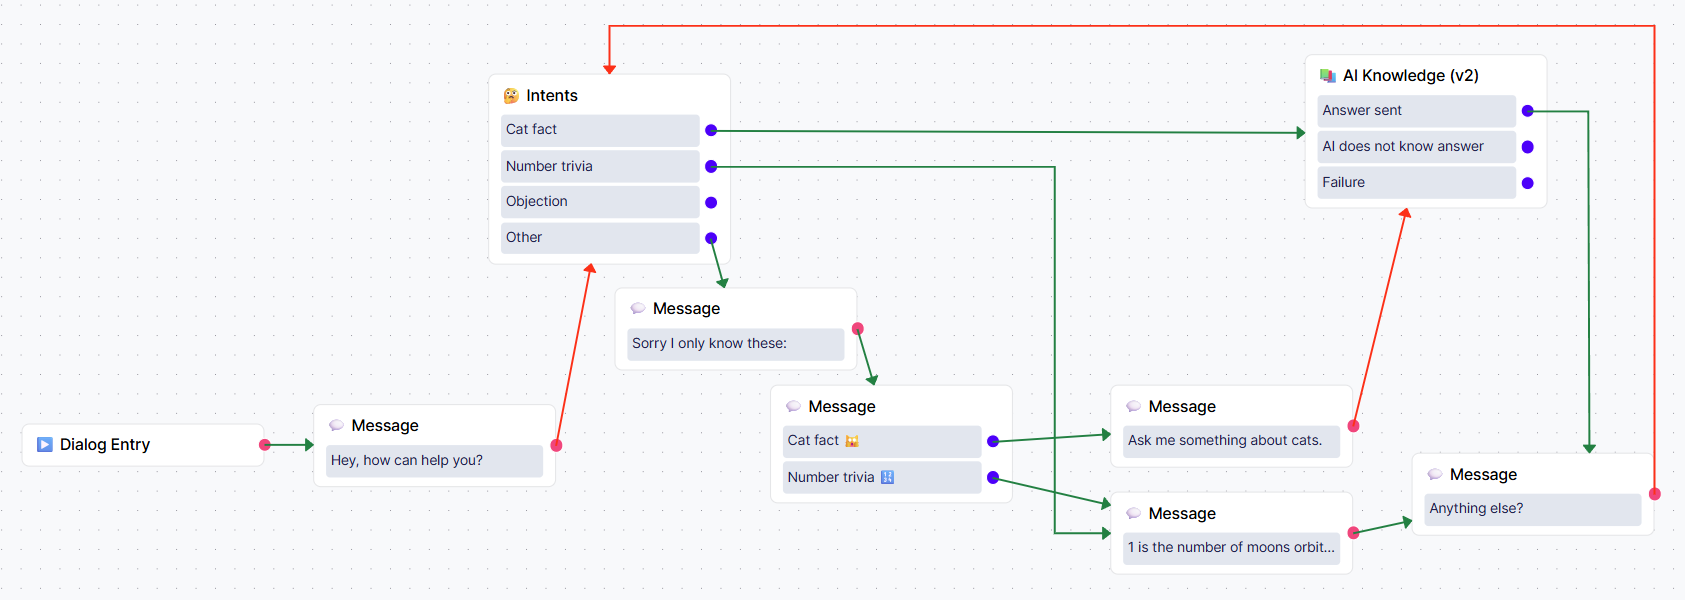
We will update the existing dialog we created in the previous parts of the tutorial. Try to replicate the dialog shown on the picture:
-
Add an
Intentmodule before messages containing your replies. -
In the
Intentmodule settings, define two intents with the following names and instructions:-
Cat Fact – User wants to know a fun cat fact
-
Number Trivia – User is asking something interesting about a number
-
-
Connect each output to the corresponding response message.
-
Use the Other output to handle unexpected input (when user writes a different intent). You can gently guide the user back to your buttons.
You may have noticed that two of the arrows in your flow are red instead of green.
This means the bot is set to wait for user input before continuing.
Note: If buttons are used in the Message module, the bot always waits for user input, even though the arrows are green.
Pause for User Input
When you're working with free text input (instead of buttons or forms), the bot can't automatically tell when it should pause and listen. You need to manually set that pause.
This is especially important in voicebots, where users respond by speaking as there are no buttons or UI interactions to trigger the next step.
How to Set a Pause:
-
Click the arrow connecting the previous module to the Intent module and a small toolbar will appear above it.
-
Click the Pause icon (⏸️) and the arrow will turn red, confirming that the bot will now wait for input at this point.
If you skip this step, the bot might rush through the dialog without giving the user a chance to reply or you could easily create an infinite loop in you dialog flow.
In other words, the bot will go through everything connected with green arrows without pause, and will only stop at a red arrow, a Message module with buttons, a Form module, or other module requiring an interaction.
(If you manage to create an infinite loop, the dialog flow will be redirected to the exception dialog after few loops.)
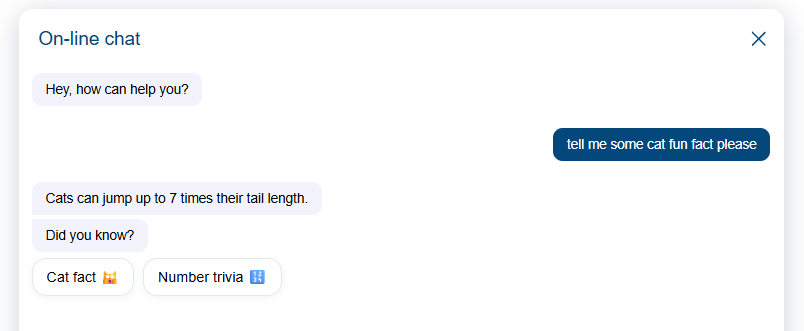
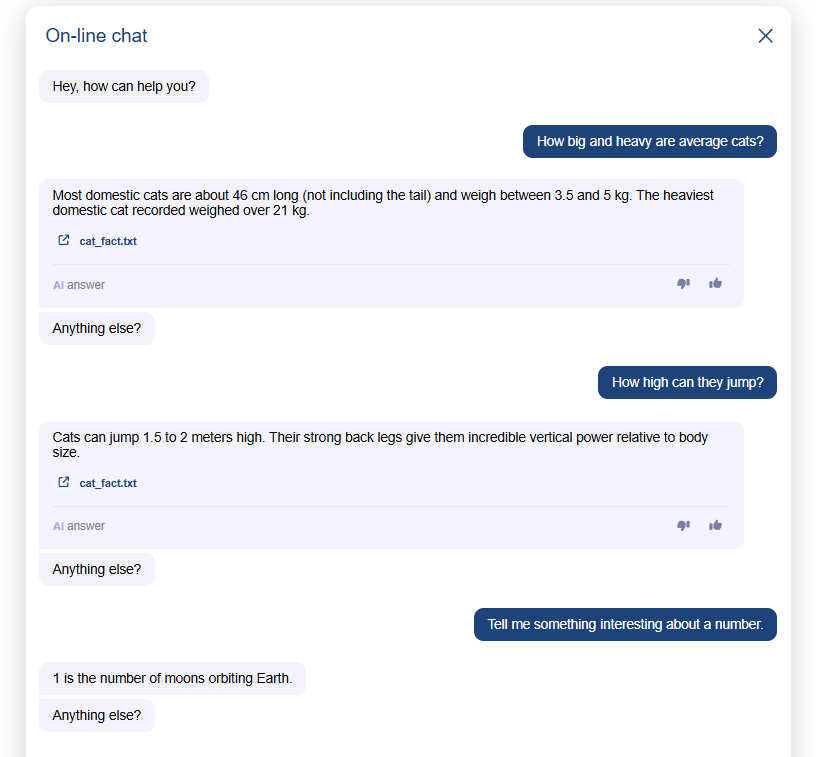
Test the Intent detection
Your dialog should now behave like this:
🧠 2. Add Generative AI Responses
Let’s expand the bot’s knowledge so it can respond to more cat-related questions without manually writing every answer.
This is where AI Knowledge comes in: instead of adding static replies, we’ll upload some data and let the AI automatically generate responses from it.
📄 Upload Your Knowledge
We’ll use a basic text file for this tutorial, but you can also upload PDFs, connect websites, or link Google Sheets. See the 🧠 AI Knowledge article if you want to explore other source types.
-
Go to AI Knowledge from the left-hand menu.
-
You’ll see an existing empty Files data source. Click it and in the top-right corner, click ➕ Add Files.
-
Upload your file and click Save.
cat_fact.txt(← you can download this template for this exercise) -
After uploading, your file will appear listed but it’s not synced yet.
-
Click Content Update (the 🔄 icon at the top left) to sync your new content with the AI search engine.
AI Knowledge is automatically refreshed (default setting is every 24h), but syncing manually ensures your changes are available right away.
🔁 Update Your Dialog to Use AI Knowledge
Now that the knowledge is available and synced, let’s connect it into the bot’s logic:
-
Return to your test dialog in the Dialogs section.
-
Find the AI Knowledge module in the Modules panel.
-
Drag and connect it to the flow as shown in the image.
-
Optionally, adjust the Prompt settings in the AI Knowledge module if you want the AI to answer in a specific way (e.g., tone, format, etc.).
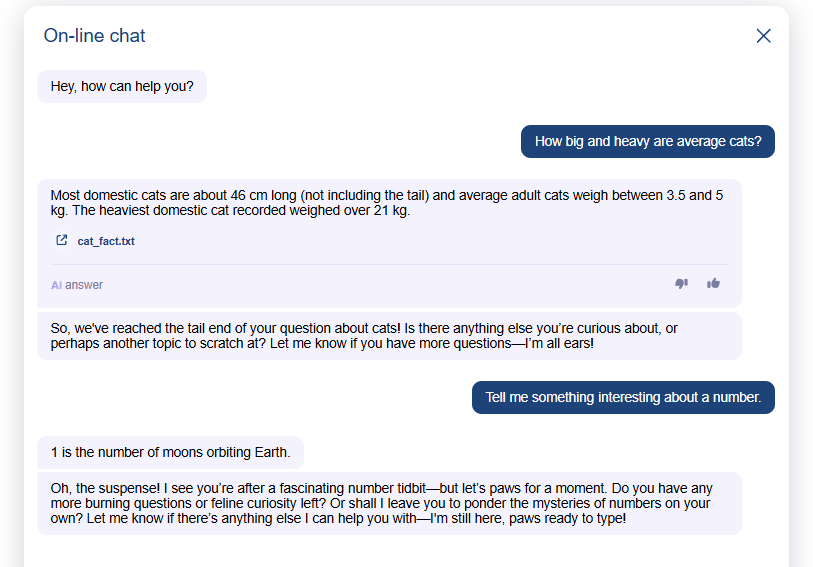
✅ Test It Out
Go to the Test panel and ask the bot something new like:
“What’s the average weight of a cat?”
If your AI Knowledge file contains relevant information, the AI will use it to respond — even if the intent wasn’t explicitly defined.
Only questions about topics that are included in your AI Knowledge base will be answered. "Tell me one random fact." will not work with AI Knowledge modules.
By adding AI-generated responses, your bot becomes much more scalable and easier to maintain with no need to hardcode every possible reply manually. This works very well with FAQs, Terms & Conditions, etc.
Real life projects usually combine both approaches:
-
Static responses → Check order status, Returns, etc.
-
Generative responses → FAQs, Company/Product info, etc.
Next, we’ll take things further by connecting the bot to external services using APIs. For example, we’ll call a real number-facts API to answer trivia questions dynamically based on user input.
Real-time data + AI = powerful, smart bots.
Let’s see how to set it up.
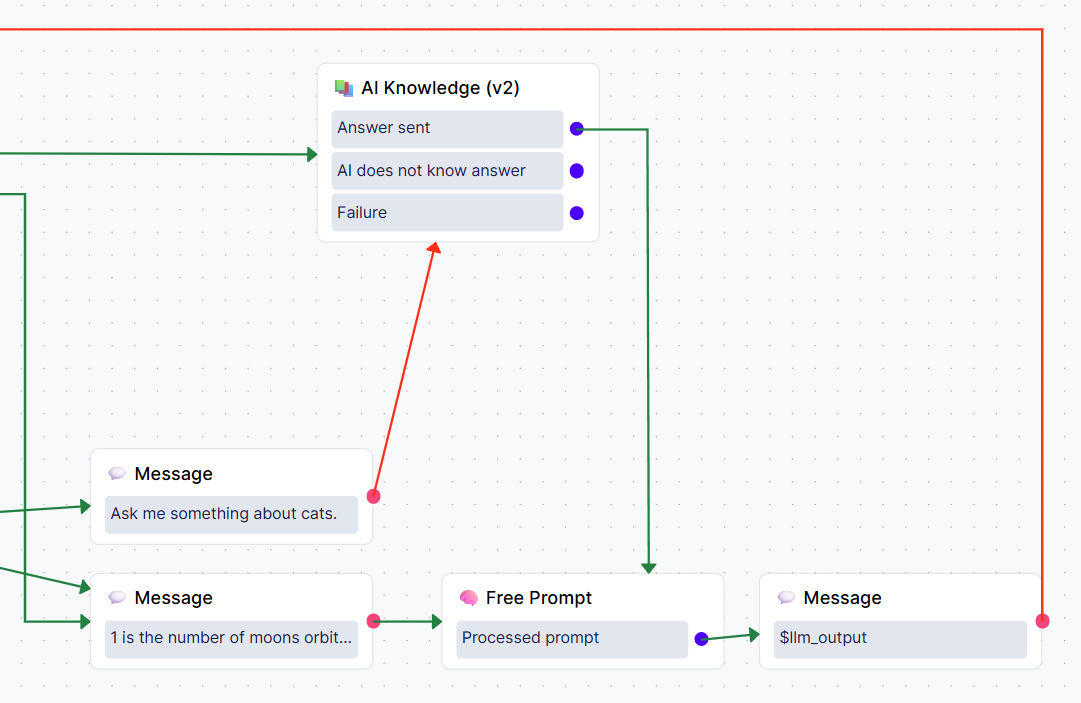
⭐ Bonus task - Smarter Follow-Up with Free Prompt
Instead of ending the dialog with a boring “Anything else?”, we’ll ask a personalized question based on what just happened in the conversation.
We’ll use the Free Prompt module. It allows you to use the LLM model with your prompt to generate AI responses based on the conversation history and your custom instructions.
-
Replace the static “Anything else?” Message module with the Free Prompt module.
-
Use this prompt:
“Based on previous conversation, ask the user if they need anything else or have further questions. Be witty and do not answer any questions.”
-
Remember: Free Prompt does not send the response directly. It only stores the result in the $llm_value context variable (we’ll learn more about contexts later).
-
Add a Message module right after the Free Prompt module and insert
$llm_valueas the message content. -
The bot will read the response stored in the $llm_value context variable and display it as a message.
This isn’t necessary but it shows how powerful and fun your chatbot can be when you combine context + LLM.
While this use case is fun, it could be a bit expensive to spend tokens just to generate follow-up. However you could use Free Prompt in many important places like summaries, FAQs from smaller data sets (e.g., tables included in your system prompts), etc.